Finally a new blog post, lots going on around here, sorry for the delay
Do you have lots of big blank walls in your home?
Don't be afraid of big walls..... they can be so much fun to decorate
but you have to have a plan
and a patient husband {or all the tools, and measuring, and painting, and ladder skills yourself}
here is my story:
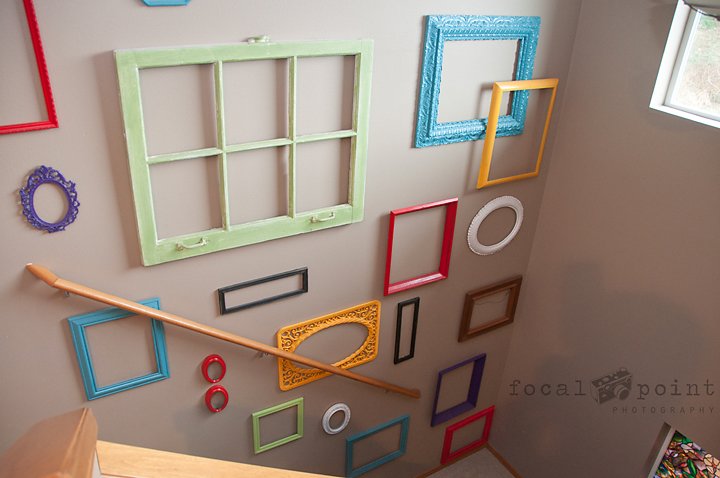
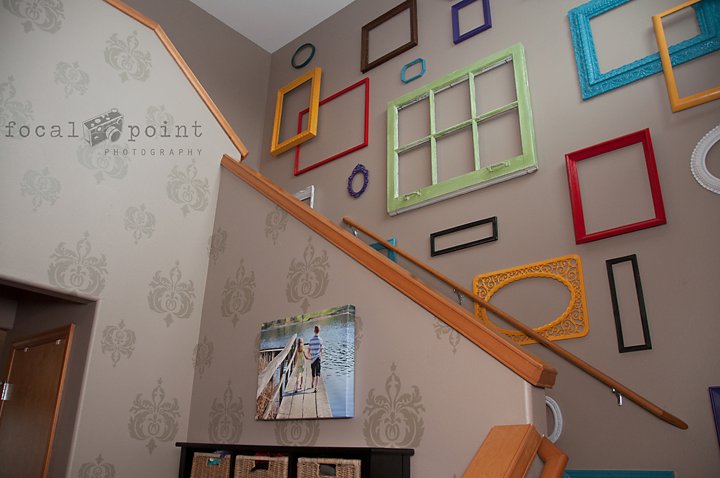
We have one of those houses where you walk in and there is a staircase immediately inside the door. You know the kind where there is a few steps, then a landing, then a lot of steps, then a landing, then a few steps, then the upstairs hall.. kinda like a boxy "C". Well, we have that. And the wall is HUGE and goes up stairs, and has a handrail up it.
So, what do you do with that?
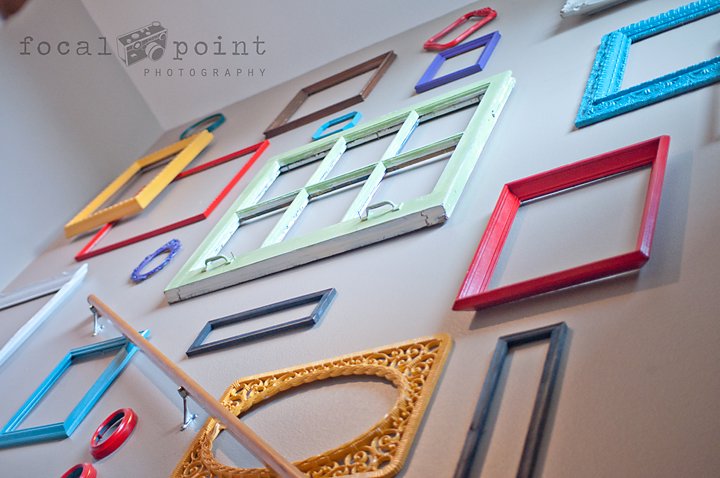
Awhile back I had a crazy idea to fill it with frames... but without photos....odd.. since I am a photographer, eh? Go with me anyway... a big crazy fun wall with gobs of color and personality. So, I began searching for frames at garage sales, thrift stores, my own garage, other peoples garage... you get the point. Then I stashed them in the garage {which may be one of my husbands pet peeves}. I didn't really care what color the frame was because I was going to change that anyway. {by "I"- I mean my sweet husband who loves to paint for me}
Ok, fast forward to this past summer. I decided that my collection was starting to overtake the garage, so it was time to get this dog and pony show started. Here is where you better start taking notes if you want to do this project.
1- I emptyied all the ugly pics and paintings that were in the frames and threw them away. {again, when I say "I"- I mean husband. I will stop telling you that and assume you get my drift}
2- I measured the frames and wrote down the measurements
3- got out my calculator and used fractions to scale down the sizes to a more manageable size for patterns
4- cut out "to scale" boxes of scrap paper that coincide with each frame size {so, if the frame was a 16x24, I made the paper 4x6} get it? my math teacher MR Gann would be so darn impressed
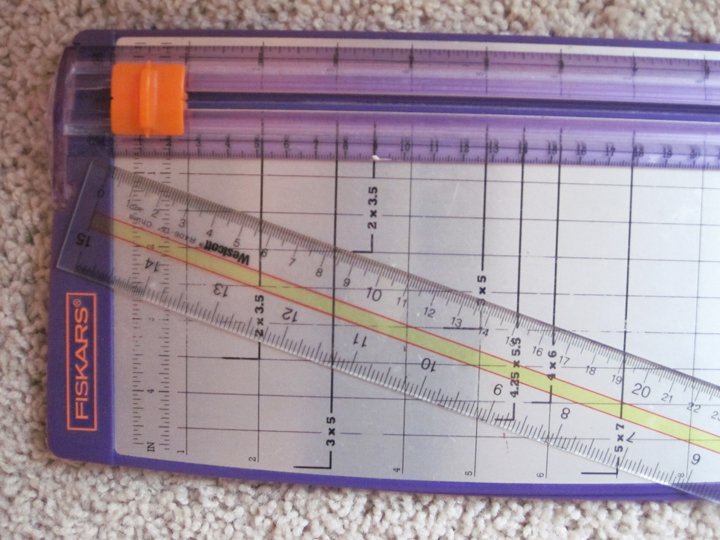
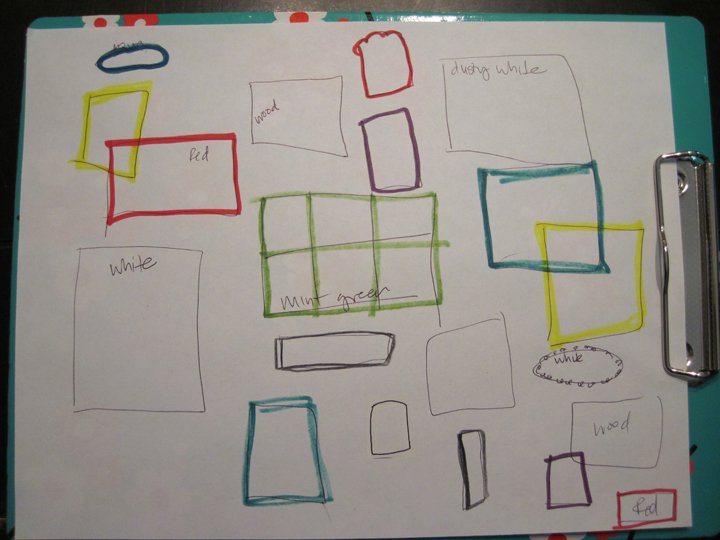
5- measured the large crazy boring blank wall and then scaled it down to size and decided to use my large chalk board as the "wall" for my design stage {in my photo below you can see the blue line is the handrail and the bottom line is where the landing starts- clever I know}
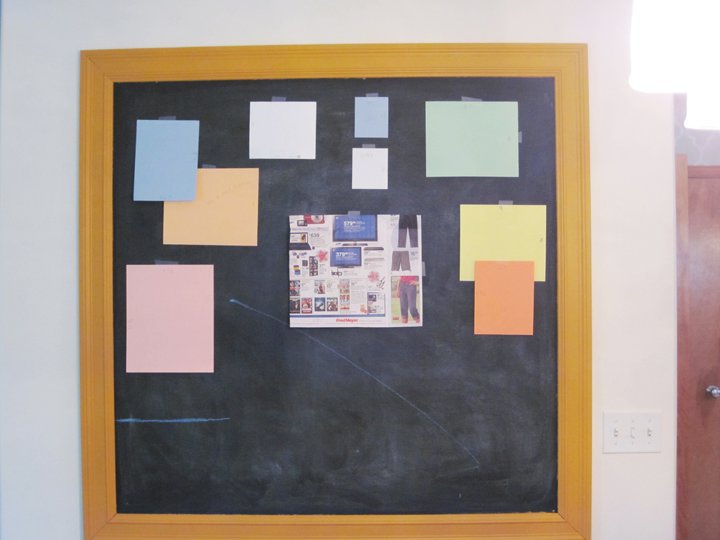
6- begin taping up the boxes {which represent the frames I had} to make a nice display. Moved them around and lived with it for awile. this allowed me to make sure I liked the style and design before we began on the acutal wall.. and the Fred Meyer add.. I didn't have any paper bigger than 12x12, so the recycle bin was 2nd best.. .and the color of the paper does not correspond at all to the frame color, it was the ugliest scraps I could find that I was sure would not be needed
7- sketched out the chalkboard design on paper {not to scale..math twice in one day is too much for me} and highlighted each frame in the color I wanted them painted. This helped me figure out how to include all the colors I wanted and not end up with two frames of the same color next to eachother
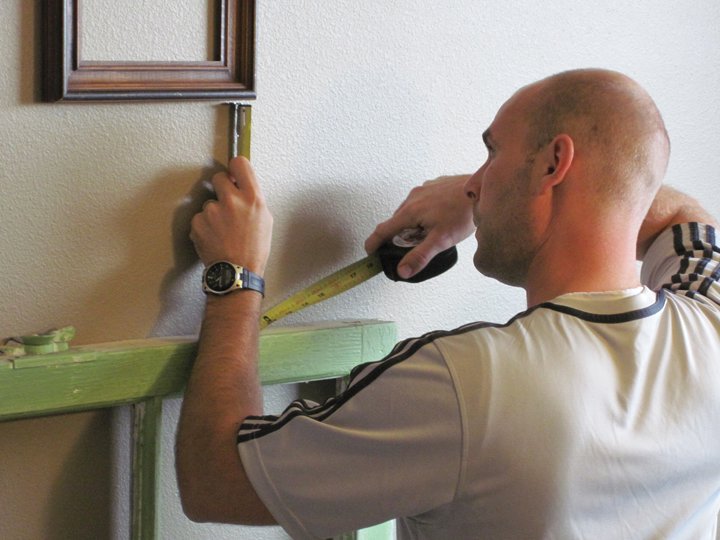
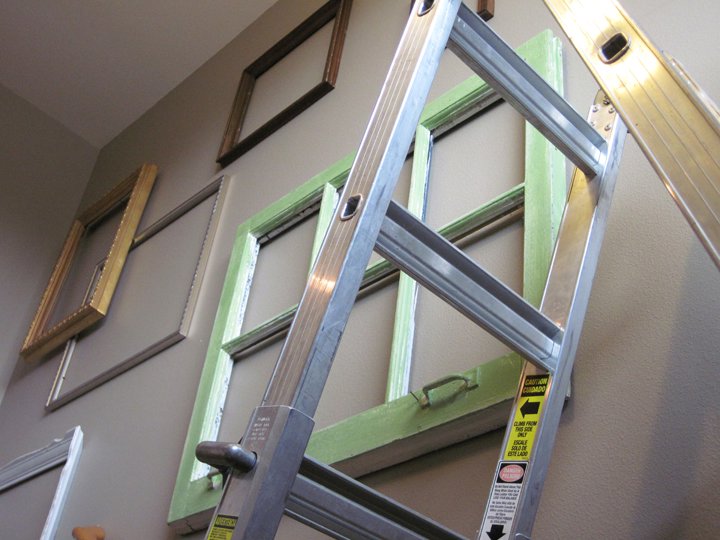
8- hang the frames on the wall {I am making this sound so simple and its wasn't} we have stairs and you need a fancy ladder that will work on those, and we borrowed one, and I like to change my mind. I did not paint them at this point. some were already painted the color I chose to leave them, but I wanted to make sure I loved it before asking hubby to paint..we may or may not have had a painting changing my mind issue earlier in the year... so I was trying to save face here
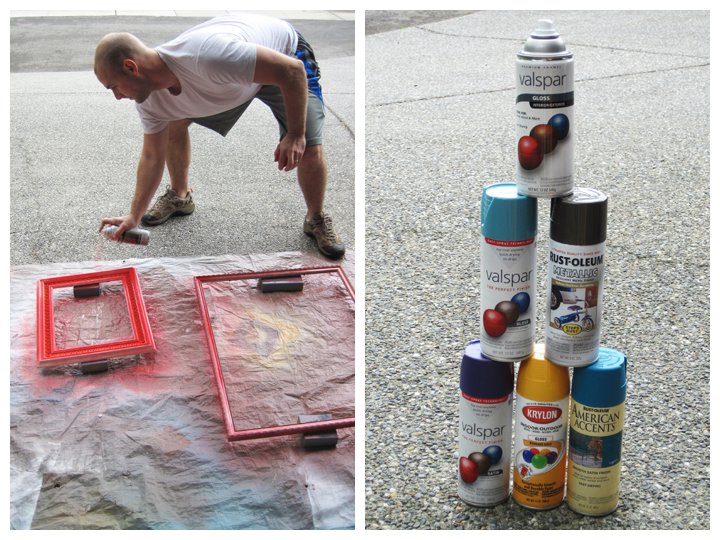
9- take down frames and paint them by using my color map I made..like paint by numbers
10- rehang painted frames. stand back. enjoy
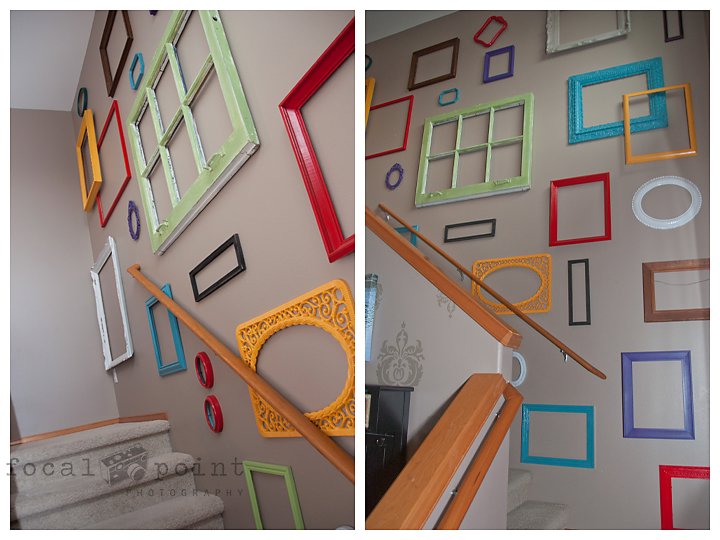
p.s.- you know the best part... some of these frames come with great memories. Two are from a dear friend who moved away. I smile and think of her when I walk by. The small red ovals were in my sister in laws childhood room {not red, of course}. I love to have little pieces of many of my dear friends and family represented here.
p.s.s- I know the red one at the top fell off the nail and is crooked. Remember the part about having to borrow a ladder, its a pain and now we don't have a truck or suburban to get it.
p.s.s.s- last note- as if you don't already know this, these are not profesionally shot photos. These are Iphone, snapshots, so don't judge me :) See, I take regular joe photos too. and they are not lit correctly, kinda shady, and have bad coloring too. we will be talking about all that here soon, so stick around!!